

Most people hang framed wall art too high, too low, or without considering wall structure and scale. The result? A room that feels visually disconnected, unbalanced, or unintentionally cluttered. Learning how to hang a picture frame correctly is not just about putting a nail in the wall it’s about understanding placement science, wall type, weight distribution, and interior design principles.
Professional designers follow measurement rules like the 57-inch eye-level rule, consider scale and proportion in relation to furniture, and choose the correct picture hanging hardware based on frame weight and wall material. Whether you’re mounting art on drywall, plaster, brick, or concrete, using the right method from drywall anchors to French cleats ensures both safety and long-term stability.
In this complete step-by-step guide, you’ll learn how to hang framed wall art with precision, whether you’re installing a single statement piece or creating a cohesive gallery wall layout. We’ll cover stud finders, Command Strips, toggle bolts, spacing rules, furniture alignment, and common mistakes to avoid so your art looks professionally styled and securely mounted.
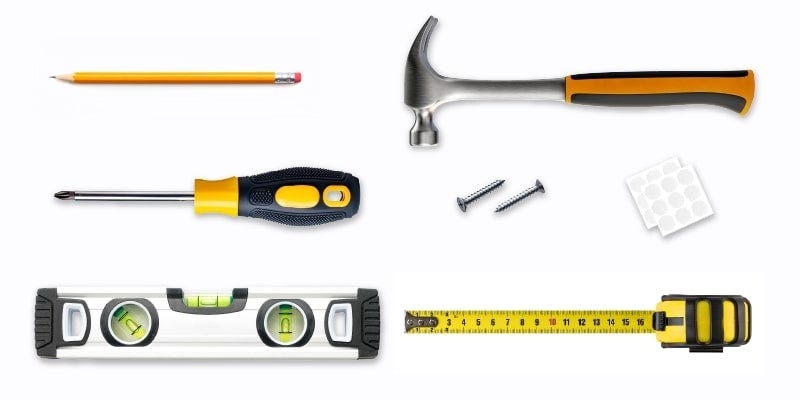
Tools and Materials You’ll Need
Before you start, gather everything you need. Here’s a quick list:
- Measuring tape
- Pencil
- Level (to keep your frame straight)
- Wall picture hanger hooks
- Hammer or screwdriver
- Anchors and screws (for heavier frames)
If you prefer not to use nails, keep some adhesive strips or hooks handy. They work great for smaller frames and prevent wall damage.
Essential Measuring and Alignment Tools
Accurate measurement is the foundation of properly hung art. A reliable measuring tape ensures precise height placement, especially when applying the 57-inch rule for eye-level art. A bubble level or laser level prevents tilted frames, which are one of the most common visual mistakes in wall décor.
A stud finder is essential when hanging heavier framed wall art, as wall studs provide the strongest structural support. If you’re planning a gallery wall, painter’s tape helps outline placement before drilling, allowing you to step back and evaluate spacing and alignment. A simple pencil is useful for marking anchor points without damaging the wall surface.
These tools may seem basic, but they significantly improve alignment, balance, and overall presentation.
Picture Hanging Hardware Explained
Choosing the correct picture hanging hardware depends on frame weight and wall type.
Lightweight frames often use a sawtooth hanger, which is easy to install but offers limited weight support. Medium-weight frames typically use D-rings with picture wire, which distribute weight more evenly and provide flexibility during leveling.
For drywall installations, drywall anchors, toggle bolts, or molly bolts increase load-bearing strength. When mounting oversized framed wall art, a French cleat system offers professional-grade stability and prevents shifting.
Understanding weight capacity is critical. Always check the frame’s weight and choose hardware rated to support more than required to ensure long-term safety.
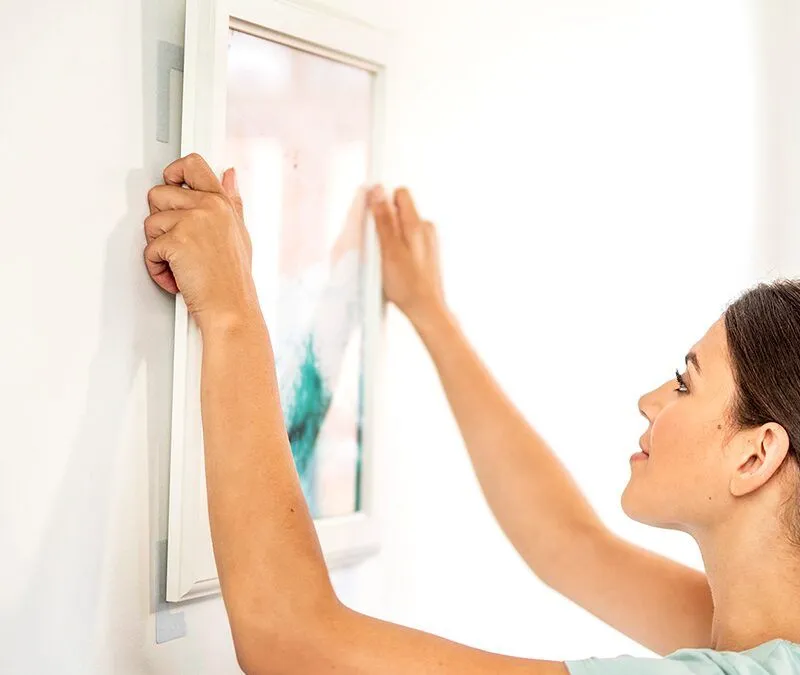
Adhesive and No-Drill Options
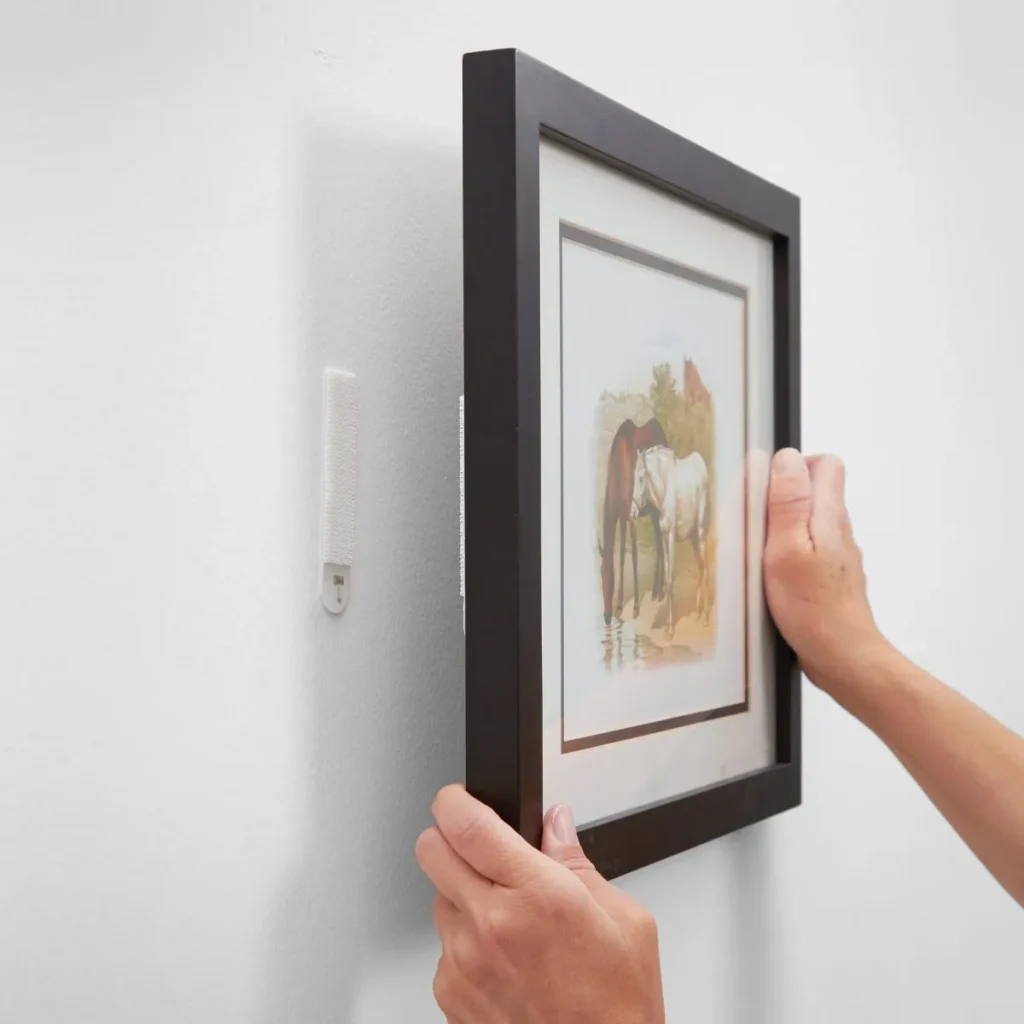
If you want to avoid nails, Command Strips and heavy-duty adhesive hooks are popular alternatives. These work best on smooth, painted drywall and lightweight frames.
However, adhesive options have limitations. They may fail in humid environments, on textured walls, or when weight exceeds the manufacturer’s rating. Always follow surface preparation guidelines and verify load limits before relying on no-drill solutions.
Step 1: Choose the Right Spot
The first thing to do before learning how to hang a picture frame is deciding where to hang it.
- For living rooms, place art at eye level usually around 57 to 60 inches from the floor.
- For bedrooms, you can hang it slightly lower to match the bed’s height.
- In hallways, align several frames in a straight line for a gallery effect.
A good trick is to use painter’s tape to outline where you want your frames to go before you drill or nail anything.
The 57-Inch Eye-Level Rule
One of the most trusted design standards for hanging art is the 57-inch rule. This rule states that the center of your artwork should be positioned approximately 57 inches from the floor. This measurement aligns with average human eye level and is commonly used in galleries and museums.
To calculate placement accurately:
- Measure the height of your frame.
- Divide it in half to find the center point.
- Measure the distance from the top of the frame to the hanging hardware.
- Subtract that measurement from the center point.
- Add 57 inches from the floor this is where your nail or anchor should go.
While this rule works well in most cases, it may need slight adjustment for rooms with high ceilings or when hanging art above furniture.
Hanging Art Above Furniture
When placing framed wall art above a sofa, bed, or console table, the 57-inch rule shifts slightly. Instead, aim to hang the bottom of the frame 6 to 8 inches above the furniture.
The artwork should also be proportional. Ideally, it should span about two-thirds to three-quarters of the furniture width to maintain visual balance. Hanging art that is too small or too high above furniture creates a disconnected look and disrupts the focal point of the room.
Scale and proportion are key design principles here the artwork should feel integrated with the furniture, not floating separately.
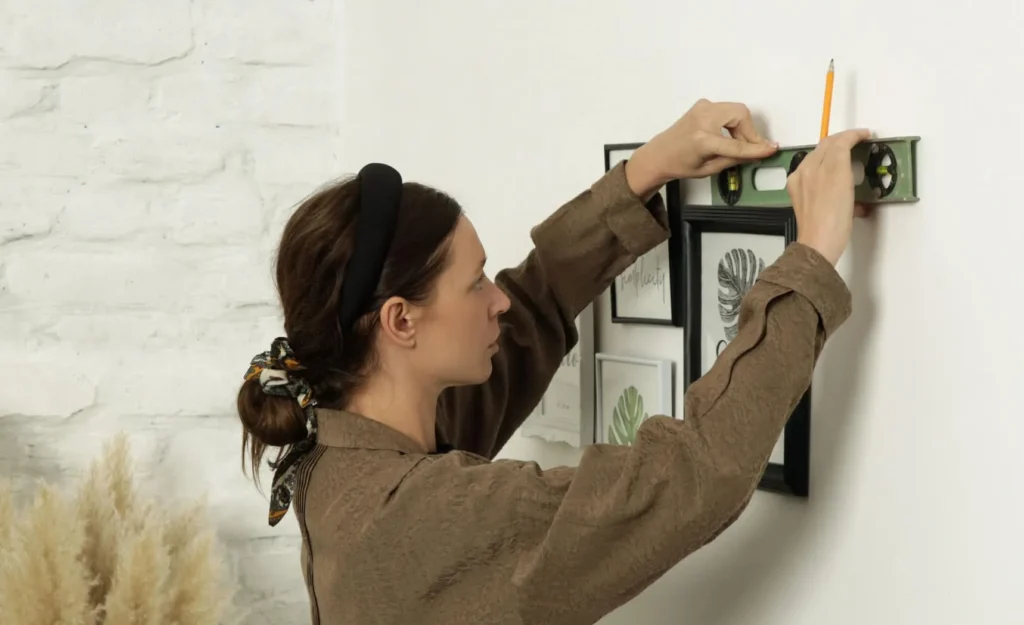
Step 2: Measure and Mark
Accurate measuring is the secret to a neat display.
- Measure the wall space and the frame dimensions.
- Mark the frame’s top edge and the hook placement with a pencil.
- Use a level to make sure the line is straight.
If your wall picture hanger hook is close to edge of frame, mark that carefully so your hook sits right where it should. This helps avoid slanted or uneven hanging later.
How to Find the Center Point of Your Frame
To ensure accurate placement, measure the total height of your frame and divide it by two to determine the vertical center. Then measure from the top of the frame down to the hanging hardware. Subtract this from your center measurement to determine where the wall hook should be placed.
Precision here prevents uneven alignment and ensures your framed wall art sits exactly where intended.
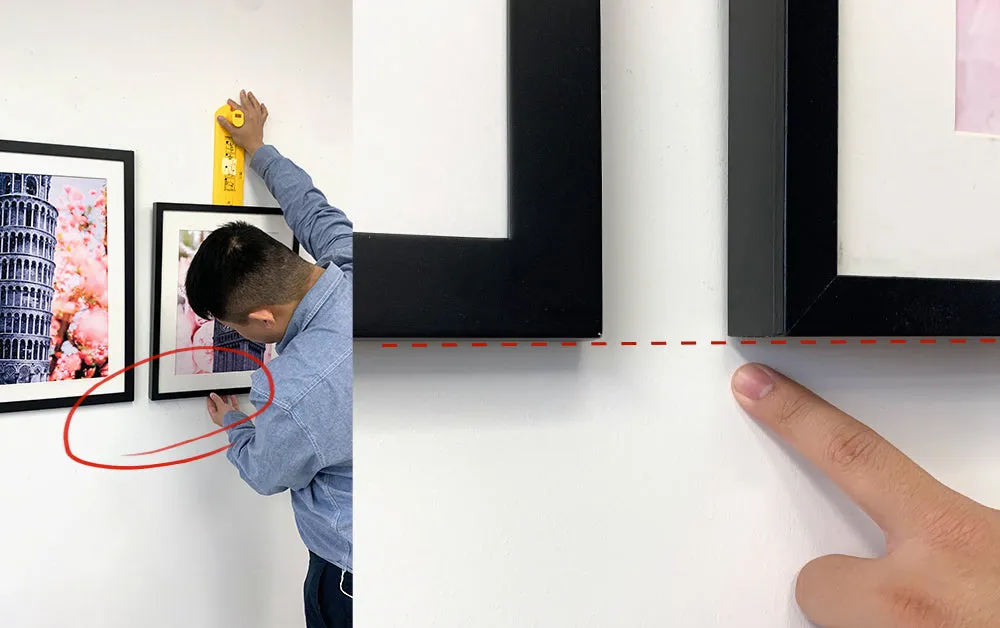
Use Painter’s Tape to Preview Layout
Before drilling, use painter’s tape to outline the frame dimensions on the wall. Step back several feet to evaluate symmetry and spacing. This technique is especially useful when planning a gallery wall layout.
For complex arrangements, cut paper templates matching each frame size and tape them to the wall. Adjust until spacing feels consistent typically 2 to 3 inches between frames.
Step 3: Choose the Right Hanging Method
Different walls and frames require different hanging techniques. Here’s how to choose:
1. Traditional Nail and Hook Method
This is the most common way and perfect for solid walls.
This method works best when you can secure the nail into a wall stud. Studs provide natural structural support and reduce the risk of sagging. Use a stud finder to locate framing beams behind drywall, especially when mounting medium-weight frames.
- Use one nail for light frames (under 10 lbs).
- For heavy frames, use two nails spaced apart for better balance.
- Always drive nails at a 45° angle it holds better.
2. How to Hang Frames Without Nails
If you’re renting or don’t want to damage walls, adhesive hooks or strips are your best friends.
For frames heavier than 20 pounds, drywall anchors alone may not be sufficient. Toggle bolts expand behind drywall to distribute weight across a wider surface area, offering superior strength. Molly bolts are another reliable option for medium-to-heavy framed wall art.
If installing oversized or valuable artwork, consider a French cleat system. This two-part bracket design distributes weight evenly and prevents forward tilt, making it ideal for heavy or large-scale art pieces.
- Clean the wall surface first.
- Stick the adhesive hook firmly and let it sit for at least one hour before hanging.
- Remember, these are best for frames under 8–10 lbs.
3. Anchors and Screws for Heavy Frames
For large or heavy art pieces, especially glass or metal frames, use wall anchors and screws.
- Drill a small hole first.
- Insert the anchor, then screw in the hook.
This ensures your frame stays secure over time.
How to Hang Heavy or Oversized Framed Wall Art
Heavy framed wall art requires reinforced support to prevent wall damage and potential injury. Frames exceeding 20–25 pounds should be anchored into wall studs whenever possible.
If studs are not available at the desired placement point, use toggle bolts or a heavy-duty anchor rated above the frame’s weight. For extra security, install two anchor points to distribute load evenly.
A French cleat mounting system offers professional-level stability. It consists of interlocking angled brackets one attached to the wall and one to the frame creating secure, flush mounting.
In households with children or in earthquake-prone areas, secure mounting becomes even more critical. Always prioritize weight-rated hardware and structural support over convenience.
Step 4: Hang and Align Your Frame
Once your hooks are in place, hang your frame and step back to check alignment.
- Use a level tool to make sure it’s perfectly straight.
- Adjust slightly if needed even a small tilt can affect the overall look.
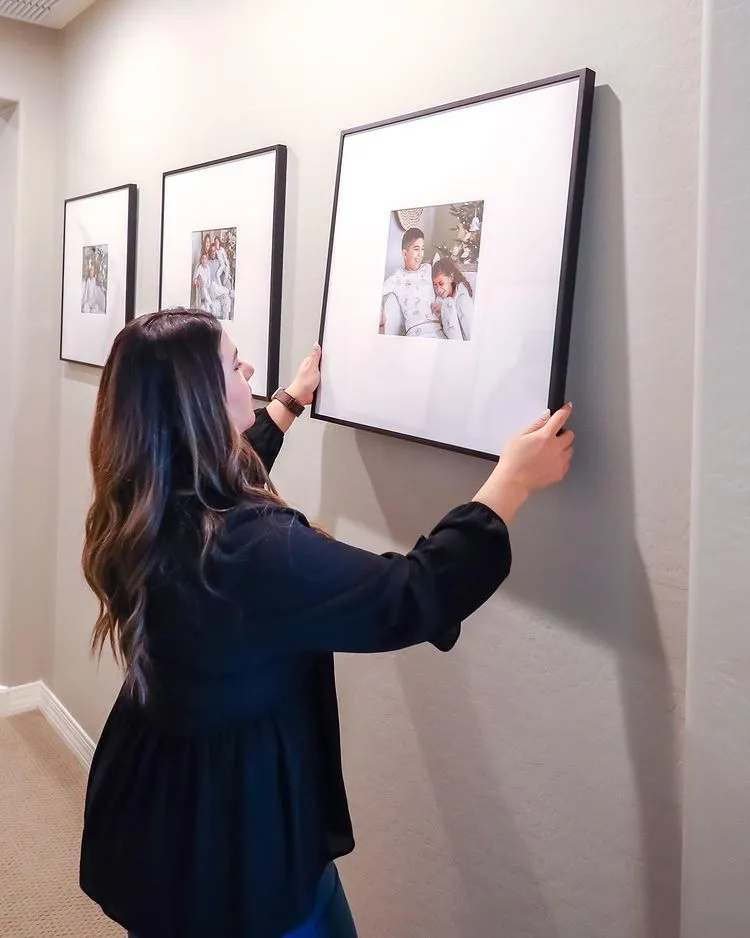
If you’re hanging multiple framed wall art pieces, start with the central one and then add others around it. Keep 2–3 inches of space between each frame for a balanced gallery wall effect.
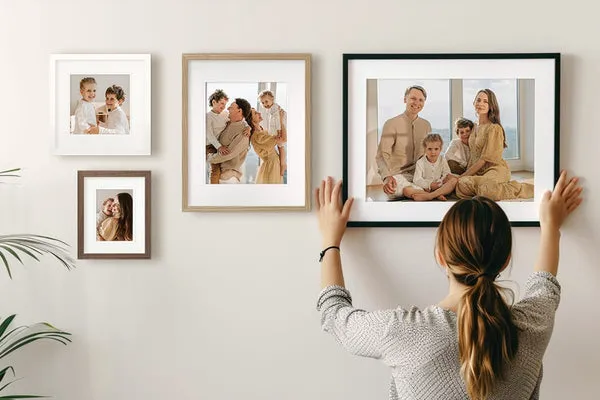
Step 5: Creating a Gallery Wall Layout
If you have several art pieces or photos, you can create a stunning gallery wall. Here’s how:
- Plan on the floor first – Arrange all your frames on the ground to see how they look together.
- Mix sizes and shapes – Combine vertical and horizontal frames.
- Keep balance in mind – Avoid crowding one side.
- Mark the layout on the wall – Use painter’s tape before actually hanging them.
This layout method makes it easier to visualize the final look and avoid unnecessary holes.
Gallery Wall Spacing Rule
Consistent spacing is essential. Maintain 2 to 3 inches between frames for a clean and cohesive look. Uneven gaps create visual imbalance and reduce professional appeal.
Keep spacing consistent both vertically and horizontally to maintain alignment.
Popular Gallery Wall Layout Styles
There are several layout styles to consider:
A symmetrical grid layout works well with matching frame sizes and creates a structured appearance. A salon-style layout features varied frame sizes arranged organically around a central focal point. A linear arrangement aligns frames horizontally or vertically for modern interiors.
Choose a layout that complements your room’s aesthetic and maintains visual balance.
Pro Tips for Perfect Framing
Lighting plays a significant role in how framed wall art is perceived. Position artwork away from glare and consider accent lighting to highlight statement pieces. Install rubber bumpers on the back of frames to prevent wall scuffs and shifting.
Mixing frame finishes such as wood, black metal, or gold accents can add character, but maintain a cohesive color palette to avoid visual chaos.
When in doubt, lean oversized frames on picture ledges for flexibility and seasonal rotation.
Here are some useful tips to make sure your frames look professional and stay secure:
- Always double-check the frame’s backing wire before hanging.
- For large frames, use two hooks to avoid tilting.
- Keep consistent spacing between multiple frames.
- Avoid hanging art in direct sunlight to prevent fading.
- Use rubber bumpers on frame corners to prevent wall scratches.
If your wall picture hanger hook is close to edge of frame, you can add a small rubber pad or use a D-ring hanger instead for better stability.
Step 6: Adjust According to Wall Type
Drywall is the most common wall material and requires anchors for medium-to-heavy frames. Plaster walls are more brittle and require careful drilling with appropriate bits. Brick and concrete require masonry drill bits and heavy-duty anchors.
Tile walls demand precision to prevent cracking drilling into grout lines is safer than drilling into tile itself.
Always assess wall material before selecting mounting hardware.
Not all walls are the same here’s what works best for each:
- Drywall: Use hooks or anchors. Nails alone might not hold heavy art.
- Brick or Concrete Walls: Use masonry screws or drill holes for strong anchors.
- Wood Walls: Nails work fine here, but don’t hammer too deep.
Knowing your wall type ensures your art stays up safely for years.
Step 7: Final Touch Step Back and Admire
Once your frame is in place, take a step back and look at your work. Adjust if something looks off.
Try viewing it from different angles sometimes a small shift makes a big difference.
When everything feels right, you’ll see how beautifully your framed art adds warmth and personality to your home.
Common Hanging Mistakes to Avoid
Even experienced decorators can make small errors. Here’s what to avoid:
- Hanging frames too high or too low.
- Using weak hooks for heavy frames.
- Ignoring level alignment.
- Not checking the hook position when wall picture hanger hook is close to edge of frame.
- Forgetting to measure spacing between multiple pieces.
Following these steps ensures your wall art not only looks great but also stays securely in place.
Why Hanging Art Correctly Matters
Learning how to hang a frame properly isn’t just about looks it’s also about safety and design harmony.
- Correct placement enhances your interior design.
- Proper tools prevent wall damage.
- Balanced arrangements create a sense of peace and symmetry in your room.
Frequently Asked Questions About Hanging Framed Wall Art
How high should you hang a picture frame?
The standard recommendation is to position the center of the frame 57 inches from the floor, aligning with average eye level.
What is the 57-inch rule?
It’s a professional guideline used in galleries to ensure artwork aligns with natural viewing height.
How far above a couch should art hang?
The bottom of the frame should sit 6 to 8 inches above the back of the sofa.
Can Command Strips hold heavy frames?
Only within their specified weight rating. Always verify manufacturer limits before installation.
How much space should be between frames in a gallery wall?
Maintain consistent spacing of 2 to 3 inches for visual balance.
Final Thoughts
Hanging framed wall art is both a technical and design-driven process. By combining accurate measurement, proper hardware selection, and thoughtful placement, you can transform blank walls into visually balanced focal points.
Take time to measure carefully, evaluate wall type, and prioritize structural support. When done correctly, well-hung art enhances room harmony, elevates interior style, and reflects intentional design.
Whether you’re hanging one picture or building a gallery wall, knowing how to hang a picture frame and how to hang frames without nails gives you flexibility and confidence.
The right setup keeps your walls neat, your artwork secure, and your room looking stylish. So, take your time, follow these steps, and enjoy the transformation your framed wall art brings to your space.
Because when it’s done right every frame tells a story worth hanging.